Posts

Merry Christmas

Image
Hi everyone Candy here with my last tutorial for the month of August. I have made a 6x6 inch card and yes getting ready for Christmas.  It is the middle of August already it will be here before we know it. I have started with a 6x6 inch card base. Double matt your papers and tape to the front of your card. Add a white doily to the top. The Christmas ornament and single bow paint with white paint.  When they are dry cover the ornament base with Christmas paper.  Cover the bow and the ornament bow with glue  then cover the ornament with red glitter and the single bow with the white glitter. Glue the large ornament to the front of your card and add the single bow on top. Then a large bling to the middle of the bow. Add the flowers and leaves and using the word Merry Christmas  matt on white card stock and add tot he card. Memory Maze products Christmas decoration bauble 1 Lots of bows Tha...

Adore Perfect Moments

Image
Hi everyone  Candy here today  I am sharing with you all a 6X6 inch easel card. I have used Memory Maze chipboard items and the pink glitter. Today I have created a  shaker card. The larger heart on the out side I covered with some of the paper.  But before doing that I cut out a piece of acetate in the shape of a heart. Traced it and the glued it onto the front  of the heart. Then glued the paper over the top.  I then cover the heart with glue and sprinkled well with the glitter. I added two layers of foam tape to the back of the heart to give plenty of area for the glitter and sequins to move around.  The Adore heart I painted with white gesso and while this was wet sprinkled the glitter over the top.  And the perfect Moments labels I white washed with gesso and then used a black gel pen to make  the words darker and show up. Memory Maze products used Adore/Heart Etched Words Pretty p...

Wedding card and matching gift bag

Image
Hi everyone it is my turn to make a creation using some wedding theme chipboard from Memory Maze. I also chose the Kaisercraft Two Souls paper collection. Using the black card base has really taken me out of my box, but I did it.   I made a 5 1/4 x 5 1/4 inch card and also a medium size gift bag  The card I chose some pattern papers from the collection and cut them down to fit onto the front of the card base. I used an edge distresser around the edges and taped them down.  This is such a lovely collecion it was hard to decide. I chose a few of the collectables for both the card and gift bag. The gift bag I added the papers to the front also some lace to the top and the piece for the top is raised to give some dimension. I used two chipboard hearts and covered them well with some silver ink.  This ink was very wet so I applied the silver embossing powder and hit it with my heat gun.  If you have a wet in...

Wedding Card and box

Image
Hi everyone Candy Here Today I have created a stunning Wedding card. Using some of the chipboard pieces available from Memory Maze I also made a box to go with the card but my camera had a miss fit and I dont know why... Instructions 1. Using a 6 x6 inch card base. Mine was blue 2. Cut a piece of white cardsock at 5 7/8 x 5 7/8 inches and the embossed piece paper at 5 3/4 x 5 3/4 inches 3. Tape both of these to your card front. 4. Add a piece of netting over the embossed paper, this calmed down the colour a bit. 5. I cut the oval die from some of the blue card and aslso one from white card 6. Glue the fancy oval first , then the middle blue oval to the centre. Then add the white lattice over the blue 7. Glue on the flowers, pearl sprays etc onto your card. 8. Paint the wedding couple and the Congratulation word with white paint or gesso, while this is wet sprinkle with clear glitter and let dry. Add these to he front of your card also Liquid pearls ar...

Beautiful

Image
Hi everyone today I have created another 6x6 inch card for you using the Memory Maze chipboard designs. Using a 6x6 inch card base Cut one piece of pattern paper at 5 7/8 x 5 7/8 inches and another at 5 3/4 x 5 3/4 inches.  Distress using an edge distresser or your scissors around all the edges. Tape the bigger pattern paper down first then the second using foam tape to give some dimension. Tear a piece of pattern paper approximately 2 inches wide. Distress around the edges of this piece.  Cut a white doily in half and tape one half to the left  and one to the right sides of your card. Tape the 2 inch pattern paper over the gap of the doily. Cover the butterfly tag with pattern paper and cut away the butterfly at the top of the tag. Ink around the edge of the tag and using foam tape, tape over the 2 inch strip of  pattern paper. Now for the butterfly, word and the fairy. Cover well with white paint or gesso. While...

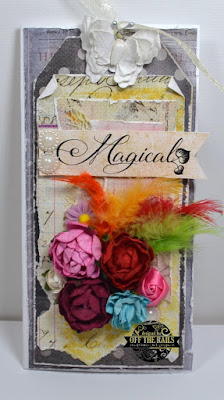
Magical

Image
Hi everyone this month on Off the Rails we the design team had to use the mood board as well as something recycled. I thought and looked around my craft room thinking what can I use. I had a very large bag of tags that where given to me over the years in different swap groups. So I decided to use one of them as my recycled item. I simply put the tag on a 4x8 inch white card base and added a pattern paper underneath.  Design team Here is the mood board Thank you for visiting Candy Chelepy 2019 Off the rails design team

Just for you

Image
Hi everyone I am up again with another tutorial using Memory Maze products. Today I have made a 6x6 inch card for you Firstly start with your 6x6 inch card base, I have used white for this. Cut your pattern paper at 5 7/8 x 5 7/8 inches and tape to your card base.  Then cut a second pattern paper at 5 3/4 x 5 3/4 inches.  Now with the second paper tear approx a 4 inch strip off the right hand side. Curl the torn edge and tape to the left side of your card base. Cut the smaller piece at 5 5/8 inches length wise. Curl the torn edge and tape to the left side as well. Paint all your chipboard pieces and while they are drying  cut a piece of the white glitter paper to fit inside the oval chipboard.  I turned my glitter paper over and traced the oval with a pencil then cut it out making a little bigger so I could glue to the back of the oval frame. Cover the oval frame, butterflies both metal and chipboard with the shabby white em...