Posts

Showing posts from 2016

Our Fairy Princess

Image
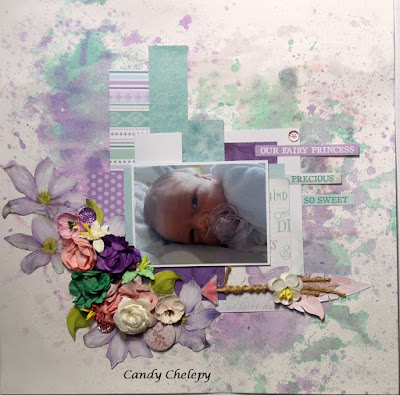
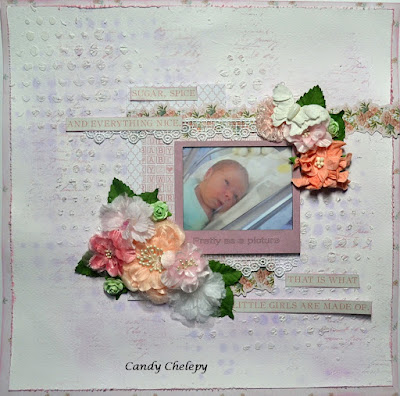
Welcome everyone to my second blog of the day. This one is for Funky Flair mood board challenge. Just loved these colours that had to be used. Just went with another photo of Zarna. The background has been created with Lindy's sprays  and a stamp block. This echnique was one og the classes I was taught when I went to Adelaide by the lovely Natalie May. So beautiful. Products used White cardstock clear Gesso Lindy's sprays Cest la vie cerise, Chateau rose, tea pot purple and T bird tirquoise Kaisercraft Fairy dust collection papers and stickers Bohemian paper flair kit Kaisercraft and green tara flowers Kaisercraft sparklets Thank you for visiting xxx Candy

Little Moments

Image
It is time again for me to share with you all another layout for Just Add Flair I have had this Kaisercraft paper range in my stash for a very long time and always looked at it and thought what am I going to do with this. So going through my stash I thought just use it. I have raised the leaves and flowers to give a bit of dimension. Even the love hearts at the top of the tags. Just Add Flair product Natalie Flair Button Other products Kaisercraft Say Aloha collection Tiki hut, weave, pina colada, rain forest papers Collectables Tim Holtz black soot distress ink Glitz n Glamour black Thank you for visiting xxx Candy

Dream Big Sweet Girl

Image
Welcome to another layout that I have completed for the Just Add Flair  design team. I have used the Kaisercraft Peek a boo collection and another photo of Zarna Rose. Just Add Flair products wooden deer buttons Stella flair button Other products Kaisercraft Peek a boo collection -  new arival and young one Collectables Prima and green tara flowers pink and white cradstock pink ink Thank you for visiting xxx Candy Just add flair DT

Pretty as a picture

Image
Welcome to another month it is getting closer and closer to Christmas. I think the older you get the quicker the year goes.  Today I have created another layout for you using the chipbpoard from Memory Maze And yes another beautiful photo of my Grand daughter Zarna Rose. I cut down the white cardstock so it measures 11 1/2 inches square,  then I used an edge distresser and distressed the edges. Tape this onto the pattern paper. I used a circle stencil form Memory Maze and the lilac spray,  then I added the texture paste over the top using the same mask. Let this dry then spray on some of the snow angle spray. Let this dry and stamp using a script stamp and pink ink all around your layout. I have cut pieces from the 6 1/2 inch paper pad, using three pink coloured papers. Tape these down you might have to use some glue as the tape may not stick well to the mixed media on the layout. I have added a flower border from the sticker sheet as well also

Love and Treasure

Image
Today I am bringing you all my latest creation for Just Add Flair I have made two 6x6 inch cards for you using the lovely flair buttons. Card 1/ LOVE Easel card Just add flair product Wooden heart/ love button Becky flair button Other product used Kaisercraft Ooh la la collection - Bonjour paper Collectables white cardstock white doiley thin wire metal embellie paper flowers Card 2 - Treasure Gate fold card Just add flair product Bronte flair button Other products Kaisercraft Ooh la la collection - Lamour paper collectables white cardstock paper flowers walnut stain distress ink Thank you for visiting xxxCandy

Beautiful little Princess

Image
Once again it is my reveal for  Off the Rails Scrapbooking we had a very pretty mood baord to follow this month I got my hands a bit dirty with this one. And this is how I created the background. I firstly brushed clear gesso to the white cardstock. Then using the sprays, spray in different spots and the spray with water to make it move. I then used some paper towel and daubed it moving the colour around the page.  Dry with a heat gun I couldn't wait. Using a diamond mask and texture paste place around where your photo will sit. I used blue stazon and a script stamp and daubed arond the page, y texture paste was still a bit wet so it soaked up the colour. I added a large crochet doily to the background  and placing my scraps of papers where I wanted them. Then add your photo and gently stamp around the edges with some black stazon and a stitch stamp. I have also used a small doily stamp and purple ink and stamped around the background.

Note Book

Image
Hi everyone today I am bringing you another tutorial for Memory Maze I need to make a start on my Christmas presents so I thought I would share this one with you all. I have some 6x8 1/4 inch note books in my mighty stash  and I have also used the October kit from  Paper flourish Using the two sheets of the Kaisercraft Ooh lala Collection Belle papers. Cover the outside of your book and also the inner sides of the book. I cut three bunches of flowers from the C'est la vie papers laid the white doiley down first then the largest of the flowers over the top. The butterfly dreams chipboard piece I painted well with white gesso.  And used Tim Holtz distress stains I daubed over the top.  The ripe persimmon is a very strong colour so I daubed some of the colour off  just to tone it down. When these are dry (I used a heat gun to hurry up the drying process)  I went over the top with some dimensional magic.  When dry glue onto the top of the flower an

You Make Me Happy

Image
Welcome  everyone.  Today I have created my very first layout for Just Add Flair This small company makes beautiful Flair Buttons for all occasions just go to the facebook page and follow the link to the shop you won't be disappointed. Today I have created a layout using a precious photo of my new Grand daughter Zarna Rose. I have put the layout in a frame to be put on my wall. I firstly cut an 8x8 inch frame from the pink cardstock.  You do this by placing your cardstock in your cutter so you have the edge of your cardstock on the 2 inch mark. Then by measuring and cutting from the 2 inch mark up to the 10 inch mark. Turn each side and repeat this another 3 times.  And you will be able to pull out a 8x8 inch piece of cardstock from the middle.  Cut 1/2 inch from two sides of your paper, your paper will now measure 11 1/2 x 11 1/2 inches then use an edge distresser around the edges of the cardstock and the paper. Then tape the paper onto the cardstock so you will

Good times Best ever

Image
Hello once again I am creating up a storm. Today I have created a layout using the sketch and kit from Kitaholics This company make lovely kits.  I like buying them as they have the new paper collections. And yes another beautiful photo of my  gorgeous grand daughter Zarn Rose The sketch I have turned the sketch sideways Products used Kitaholic kit Crete paper cute girl - be you and fancy papers Pink cardstock Coco vanilla die cut emphemera and make a wish embellies Assorted flowers from my stash  Pink ink pad Thank you for visiting xxx Candy

Happy Days

Image
Welcome everyone. Today I have created a layout using the mood board from Funky Flair When I saw this mood board I knew which photo to use. Tracy recently went to New York and took some lovely photos and this was one of them. Here is the mood board Products used Kaisercraft A touch of gold collection Collectables, gold doiley and pin strip paper Black and spiced pumpkin cardstock Green tara flowers Funky flair button and foiled heart and feather die cuts Afraid of the dark glimmermist spray Shimmerz Coloringz valentines spray Thank you for visiting xxxx Candy