Posts

Build your holiday stash challenge

Image
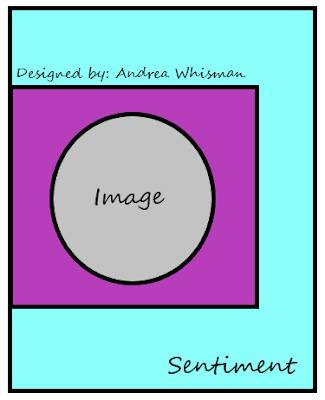
 Welcome everybody to another wonderful Card sketch challenge from Build your holiday challenge For the month of July Here is the sketch and my card Thank you for visiting Candy Chelepy

Build your sketch holiday challenge

Image
 Welcome to another sketch from  Build Your Stash Holiday Cardmakers Today I am sharing my card using the sketch for February 2023 Here is the sketch #30 I have challenged myself to use up my scraps in my mighty growing scrap box. So I pulled out some christmas and this is what I have created for you all Using papers from an old Uniquely Creative kit, lace, pearls and a glitter pen. I raised up the flowers which I fussy cut out from a pattern paper. Come along and lets see what you can make using this sketch Thank you for visiting Candy

Tuesday Morning Sketches #648

Image
 Clearing off my desk I found this sketch from Tuesday Morning Sketches And I really need to use some of my scraps in my scrap boxes. Yes boxes I have a few. So I thought I would give it a go and this is what I have come up with Here is the sketch And now my card Thank you for visiting Candy

Sketch Saturday #717

Image
 Welcome everyone I have been accepted onto the 2023 Sketch Saturday design Team This is my first sketch and here is the sketch Give this a go and have a play. It helps getting your creative juices going. You can enter here Sketch Saturday I have challenged myself to use some scraps. So this card is made from my scrap box. I have put a little piece of lace along the side  and used flowers where the circles are.  Thank you for visiting and please join in. Candy Chelepy 2023 DT Sketch Saturday

Build Your Stash Holiday Linky Party

Image
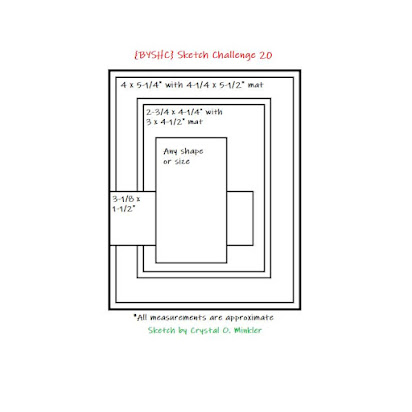
  Hello there crafty friend! I'm so excited to share my first card for the  #christmasinjuly2022hyshcip  linky party This is my very first time joining in with one of these linky party's so I hope you enjoy my cards using the sketch provided for you all to follow. Also I would like to thank the wonderful sponsers. Please feel free to join in with us and share your cards. I have made 2 cards for you all today One is  vertical and the other horizontal using the same sketch but flipping it around. I have used a very old Kaiser craft collection.  This paper range is very old.  using up my christmas stash. My first card measures 4x6 inches I have cut two pieces of the pattern papers and double matted them. I then cut two thin strips The pink one measures 5/8 x 5 7/8 inches then matted it one white cardstock The other going across the bottom meqasures1 1/8 x 4 inches and I have also matted this on white cardstock. Both of these go flat onto the front of the card....

Merry Christmas

Image
 Welcome to another share using the wonderful sketch from  Build Your Stash Holiday Cardmakers Here is the sketch we used This is my card I turned the sketch on its side' My card base measures 4 x 6 inches. I have cut a pattern paper to measure 3 3/4 x 5 3/4 inches  and taped it to the card base. I taped some ribbon along the bottom of the card. The checked piece of pattern paper measures  4 x 2 1/2 inches and used some card stock for the base of this  cut it about 1/4 of an inch bigger and tape the two together. The gold glitter is 4 x 3/4 inch, cut a fish tail at one end them place on a card stock and fish tail this as well. all the christmas flowers etc are fussy cut from the pattern papers. Place these onto the card base and then place your sentiment on top. Thank you for visiting Candy Chelepy Build your stash holiday Dt 2022

Christmas Blessings

Image
 Welcome to another month of Christmas using a fabulous sketch from Build your stash Holiday Cardmakers   Here is the sketch for March 2022 I have used an older Uniquely paper range called Holly Jolly Christmas to make this card. My cards measure 4 1/4 x 6 inches so the base paper is 4 x 5 3/4 inches and the strip along the bottom measures 4 x 1 1/4 that is cut from cardstock. The check layer measures 1 x 1 7/8 inches. That is layed flat onto the card base. The middle section (photo of the bird) is 3 x 3 7/8 and the layer of card underneath is 3 1/4 X 4 inches. This piece is raised on foam tape  Then I tied a small bow using some ribbon.  Glued it to the top of the circle sentiment then taped this to the bottom of the middle piece.  Added a small flower to the side then using a black gel pen went around the edge of the card base also the bird picture. Thank you for visiting Candy 2022 Build Your Stash Cardmakers Design Team

Merry Christmas

Image
  Welcome to my share for the Build your stash Holiday   February sketch challenge This challenge we are to use Christmas/holiday theme  February may be the month of love, but can it also be a month to start building your stash of holiday cards!!   let's have a look at this month's sketch... Here is my cards I created using this sketch I have used the Uniquely Creative Days of December Collection to make these cards. Avery pretty collection. Go and check out the other cards on the facebook page or the blog

Two baby girl cards

Image
                                                                            Hello everyone Welcome to another Design team share for Memory Maze Lasercuts Today I have made two baby girl cards using the  3D girl cuttable sheet also the clear girl verse sticker sheet. Both cards measure 4x6 inches and have the sticker sentiment inside Christening Card Best wishes card Thank you for visiting Candy Chelepy 2021 Design Team

Congratulations Card

Image
Hi everyone Today I am sharing my tutorial for Off The Rails Design Team post for May 2020 I used the mood board as inspiration to create this card. it measures 5 x 7 inches and I have sewn on the bodice of the manikin using pink glitter thread. I have cut the gold matt to 4 7/8 x 6 7/8 inches and then the pattern paper to 4 3/4 x 6 3/4 inches Edge distress around these then Tape these both together and place on the card front. The next layer measures Cut more of the gold paper at 4 1/2 x 6 5/8 inches and the pattern paper at 4 1/4 x 6 1/4 inches. Distress around the edges of both then Tape these together. place foam tape under this panel and tape to the front. I added a piece of lace panel to the front using small amounts of glue under where you wont see it through the lace. T he bodice was a clear sticker I had in my stash for a number of years so I pulled it out and stuck it to a white card stock and then sewed using the thread where th...

Thank you so much

Image
Hi and welcome everyone. It has been a while since I have posted on here, between my granddaughter,  my mum and life in general it has been hard to create. But I am back and ready as ever. Today I have created for the Off the Rails Scrapbooking Design team a 5x7 inch card using Distress Oxides. I have used spun sugar, tumbled glass and as I didn't have a yellow in the distress oxides I used squeezed lemonade and it worked well.  Sponge all the colours one by one over the front of your card base.  Then when you are ready spray with some water and daube with a paper towel. Then tape some gold spray over the top and let dry. I used some wooden leaves from my stash and daubed cracked pistachio over the top. Make sure you cover well When these are all dry place your flowers, leaves, glass dome button,  yellow and white twine. this I just tied in a bow and doubled over and glued down under the flowers. Also add the ...

Part 1 Christmas Banner

Image
Hi everyone Candy here with my latest tutorial using the Memory Maze Chipboard. Today I have created Stage 1 of my Christmas Banner.  It measures approx 8 inches in length and 8 inches wide. I started with the Christmas Angel decoration piece.  Give it a good coat of gesso or white paint. Let this dry then coat the middle (angel and leaves) with some versamark. Give a good coat of the white/gold embossing powder. Using string/twine doubled and a glue gun, wrap around the edges of the frame part of the decoration. There will be some ares you can't wrap but  when you have finished wrapping cut the twine in lengths and glue in the spaces. Cut your triangle banner and glue the decoration onto the top middle of the banner. Add the lace around the edges, flowers and leaves. Dry brush some white gesso over the top of everything using a dry brush. Punch a hole in each top corners of the banner, add a large eyelet and thread some twine through....

Merry Christmas

Image
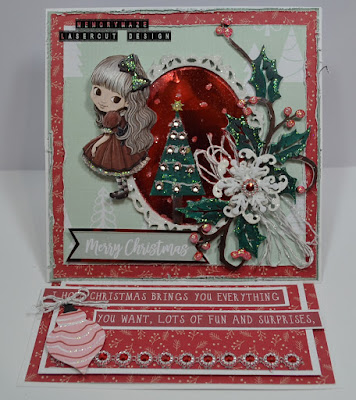
Welcome welcome to another card design for Memory Maze  Today I have made for you all another Christmas card 6 x 6 inch easel card.  I have created this card using Kaiser craft Peppermint collection and a little bling. I coated all the chipboard pieces wit white gesso or you can use white paint. The holly leaves and berries and Christmas tree I used green, brown and red embossing powders. A touch of gold paint on the edges and a little crystal stickles. The heart circle and the snowflake I covered with the white/gold embossing powder. Memory Maze products Christmas tree 2 up Other products used White 6x6 inch easel card base Kaisercraft Peppermint collection - bright baubles and combi christmas papers Red glitter paper, Crystal stickles, White gesso or paint, Distress embossing powder peeled paint Ranger rich red Embossing powder Shimmerz gold digger embossing enamel Stampendous shabby white Embossing enamel Than...

Christmas card

Image
Hello ladies and gents.  Christmas is in the air, only 18 more weeks till Christmas eekkk. Today I have created a 6 x 6 inch easel card using some Christmas chipboard pieces from Memory Maze. I painted all the chipboard pieces with some white paint, you can use gesso instead if you have some. While the paint is wet on the frame and star pieces cover well with clear glitter and let dry. The tree, holly leaf branch I coloured using some sharpie pens. Brown, red and green.  Add crystal stickles to the edges of the leaves and also on the berries. Let these dry and add to the front of your card. Memory Maze products Christmas tree 2 thank you for visiting Candy Chelepy

Merry Christmas

Image
Hi everyone Candy here with my last tutorial for the month of August. I have made a 6x6 inch card and yes getting ready for Christmas.  It is the middle of August already it will be here before we know it. I have started with a 6x6 inch card base. Double matt your papers and tape to the front of your card. Add a white doily to the top. The Christmas ornament and single bow paint with white paint.  When they are dry cover the ornament base with Christmas paper.  Cover the bow and the ornament bow with glue  then cover the ornament with red glitter and the single bow with the white glitter. Glue the large ornament to the front of your card and add the single bow on top. Then a large bling to the middle of the bow. Add the flowers and leaves and using the word Merry Christmas  matt on white card stock and add tot he card. Memory Maze products Christmas decoration bauble 1 Lots of bows Tha...

Adore Perfect Moments

Image
Hi everyone  Candy here today  I am sharing with you all a 6X6 inch easel card. I have used Memory Maze chipboard items and the pink glitter. Today I have created a  shaker card. The larger heart on the out side I covered with some of the paper.  But before doing that I cut out a piece of acetate in the shape of a heart. Traced it and the glued it onto the front  of the heart. Then glued the paper over the top.  I then cover the heart with glue and sprinkled well with the glitter. I added two layers of foam tape to the back of the heart to give plenty of area for the glitter and sequins to move around.  The Adore heart I painted with white gesso and while this was wet sprinkled the glitter over the top.  And the perfect Moments labels I white washed with gesso and then used a black gel pen to make  the words darker and show up. Memory Maze products used Adore/Heart Etched Words Pretty p...