Posts

Memory Maze Wedding card with box

Image
Hi everyone welcome to another tutorial from me for April. Today I have made a 5x7 inch card and a decorated box. I am off to our nephews wedding in May and this is just what I needed to make for them both.  I have started with a 7 3/4 x 6 inch cd/dvd photo mailing box. I bought this from my local Officeworks store. I have covered it inside and out using the Ultimate Craft Magnolia Lane Collection. I have used two frames and the long pendant heart and a double heart and applied white ink to cover well. You can use gesso, white paint as well. I then used some Distress ink Victoria velvet and a music stamp and stamped over the top of them all. Then carefully applied some dimensional magic over each one. When they where all dry I inked using the Victorian velvet again around the edges. I have also added flowers and some bling to both The inside of the card The outside of the box Inside of the box The inside with the card ...

April Paper Flourish Class in a Box

Image
Welcome everyone to another month. Ghee this year is certainly flying fast. Today I am sharing with you all Aprils Class in a box for  Paper Flourish . This kit makes heaps of cards and layouts including the instructions. Whats in the Box  PK533 Cottage Rose Paper Pack  CT854 Cottage Rose Collectables  P2077 Frames paper  ST926 Friends Clear Stickers  SB2106 Pennants BTP CD142 Ballet cardstock x 2  CD601 White cardstock x 2 CB150 Chipboard Alpha EM405 Paper doily x 5 F640 Pink flowers x 5 SB713 Pearl coloured Pearls  Glitter glue White ribbon x 1  Pink ribbon x 1  String x 1 Here is my layout and cards I have created using this beautiful kit. Thank you for visiting Candy Chelepy Paper Flourish DT

April DT project for Memory Maze

Image
Welcome..... Hello everyone my turn once more showing you all how I created my lovely heart plaque for the wall. I have had this in my stash for a while, you know how it is you buy it thinking yes I will use this one day. And for sure I have. My niece has opened a Beauty Boutique and I thought this would look lovely hanging on her wall.  I didn't do anything to the heart just left it as is. I cut with a die borrowed from a friend the letters for the word Welcome from a piece of 12x12 inch chipboard. And using  the wrought iron flourishes and a heart, give all these a good coat of gesso. I cut the largest swirl so I now have a large and a big one.  The three swirls and the letters I have coated with Lindy's embossing powder(Chateau Rose) I gave them about three coats each to give them a good look. The heart I coated with Lindy's embossing powder( Bougainvillia red teal )and toned it down with some of the pink I used on the swirls and letters. ...

Off the Rails April Mood Board

Image
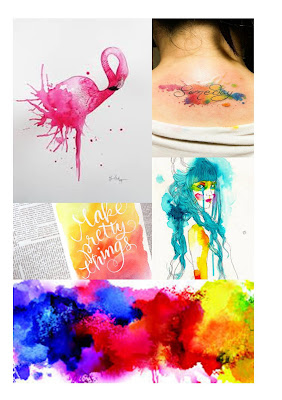
For the month of April Memory Maze is once again on e of the sponsors. So we the Memory Maze design team have been given the opportunity to complete the mood board and we have to use watercolours on our layout.  I have done an 8x8 inch page as I have been given a lot of photos from a friend of mine of her daughter, who has tragically lost her in a accident at home. I firstly started with a white piece of cardstock and covered it with clear gesso, so I could use the watercolour paints on it. This is to stop the watercolours from soaking into the paper. Ihave used some older Bo Bunny Primrose collection papers, ribbons, flowers and plenty of bling. Thank you for visiting Memeory Maze 2016 DT

Memory Maze tutorial

Image
Hi Everyone Candy here again. Today I thought I would do something different for you all. I have created two cards and a tag. The first is Busy Bee I started with a 4 1/2 x 8 inch card.  It has to be this wide to accommodate the chipboard piece I have used. Then I cut a Matt out of green paper at 4 3/8 x 7 7/8 inches  and went round the edge with the edge distresser. Tape this onto the front of your card and then I tore a piece of gauze and glued that on top as well. Using the bumble bee chipboard piece paint with white paint or gesso, then light green paint, paint your bees black then using a fine paint brush paint in the body parts. When this was dry I added a coat of dimensional magic to make it pop. Glue this to the top of your card and I then added some small flowers and punched out some small leaves and added them as well. Card 2 - Eiffel Tower I have used a 4 x 8 inch card again for this one.  Double matt this one with the bott...

Paper Flourish March kit

Image
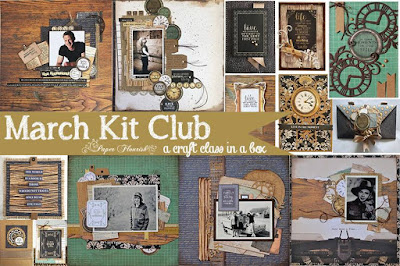
Hello everyone today I am sharing the Paper Flourish Class kit.  This is well worth the money, so hurry and order one today. You can purchase  Here This is what I have created for the classes using Kaisercraft Story Book Collection Go and visit  Paper Flourish  and check out the store and see what the Designer team have created Thank you for visiting Candy Chelepy 2015 Design Team

Mixed Media Altered Frame - Off the Rails DT

Image
Hello Candy here again. I thought I would do an Off the page project for you all today. I bought this frame a while ago and had it in my stash. Firstly I painted the frame with black gesso and when it is dry cover with some Golden fiber paste on the sides and front of the frame, and the heart. I have used some chipboard pieces from one of our sponsors Memory Maze and painted them with white gesso. I roughly daubed with some liquid pearls, the rougher the better as we want some texture. Dry with a heat gun holding close as you want it to bubble. I then used Lindy's - Blue Hawiian blue, Glimmermist afraid of the dark and sei tumble dry green sprays. I used a small paint brush and daubed here and there. Dry between the colours or you will make mud.  On the heart I sprayed the Lindy's blue hawiian spray and when dry covered with glue and apply some midnight blue glass glitter. I also sprayed the colours around the inside and outside of the frame...